
This gorgeous card lets the beautiful papers do the talking with this Stand Up Pop Up card which I have used with a birthday greeting but can be changed to almost anything and can be decorated to fit individual requirements. The original concept came from Mixed Up Craft and it may look complicated but it is quite straightforward once all the pieces have been cut to size and comes to together fairly quickly.
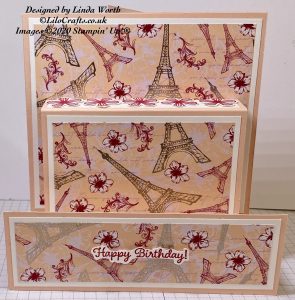
Front view
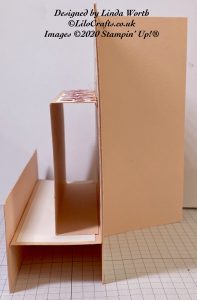
Side view
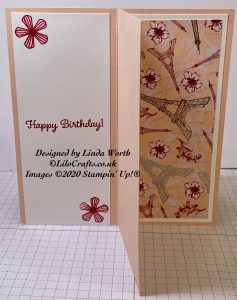
Back View
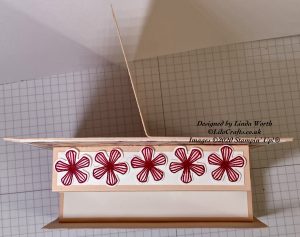
Top Down view
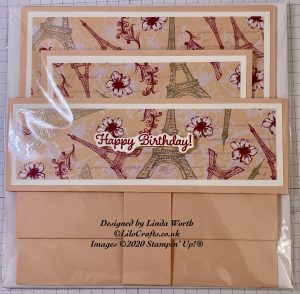
Folded flat
Finished card size 6 x 6 inches
- Coloured cardstock
- back of card – 6 x 5-1/2 inches
- main card front – 8 x 5-1/2 inches, score on long side at 5 and 7 inches
- support for base – 3 x 1 inches, score on long side at 1/2 and 2-1/2 inches
- pop-up – 5-1/4 x 4-1/2 inches, score on long side at 1/4, 1-1/4 and 4-1/4 inches
- bottom card front – 6 x 2 inches
- back stand – 6 x 5-1/2 inches, score on short side at 2-3/4 inches
- Whisper White Layer
- main front panel – 4-3/4 x 5-1/4 inches
- pop-up – 4-1/4 x 2-3/4 inches
- bottom card front – 5-3/4 x 1-3/4 inches
- bottom of pop-up – 5-1/4 x 1-3/4 inches
- top of pop-up – 3/4 x 4-1/4 inches
- sentiment piece – 2-1/2 x 5-7/8 inches
- stand piece – 2-1/2 x 5-3/4 inches
- optional piece to stamp flowers
- DSP layer
- main front panel – 4-1/2 x 5 inches
- pop-up – 4 x 2-1/2 inches
- bottom card front – 5-1/2 x 1-1/2 inches
- stand piece – 2-1/4 x 5-1/2 inches
Attach all DSP layers to the respective Whisper White layer. Add liquid glue to reverse of the main card front cardstock piece only on the top 5 inches (i.e. to 5 inch score line) attach back cardstock piece. Adhere the main front panel layer, bottom front layer, pop-up layer to respective cardstock pieces. Attach the Whisper White layer to pop-up cardstock – bottom of pop-up (this is the 2 inch section on the main card front) and top of pop-up (this is the 1 inch section after the 1/4 inch on the pop-up piece). Adhere the 1-1/4 inch section of the pop-up piece on top of the bottom of pop-up centrally. To adhere the 1/4 inch section of the pop up to the main front panel – fold the card flat and make sure only the main front part of the pop-up is showing the other pieces of pop-up is flat behind (practice this before adding adhesive); add adhesive to the 1/4 section following the instructions and 1/4 inch section will adhere in the correct place. Next adhere the bottom card front centrally, ensuring that the bottom edge lines up with the bottom of the main card front (the top will be higher and wider than the piece adhering to). Fold card flat and adhere the support piece to the bottom of the card centrally. Adhere the stand to the back of the card on the right side, add the layer on top of this, stamp your sentiment on Whisper White, adhere to left hand side. At this point decorate the card as required, this card had 5 Lovely Lipstick flowers stamped and punched, added to the top of the pop-up. Front sentiment was stamped in Lovely Lipstick and fussy cut, added to front of bottom of card with dimensionals.
Thank you for looking and hope you enjoyed this project. The supplies are listed below and linked to the online store, I would love to be your demonstrator if you are interested please contact me.
Linda x
Product List


