
For a special birthday what better way to celebrate than making a large display card to go with it. This card was created using a combination of SU products and stash products, all the measurements are listed should you wish to recreate. The original idea came from Mixed Up Craft. When folded down the card fits into 8 x 6 inches envelope, lthough when laid flat it is huge 24 x 6 inches.
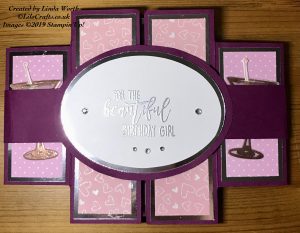
Card with bellyband when closed
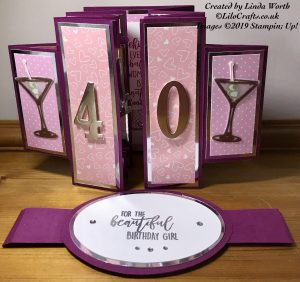
Front of card
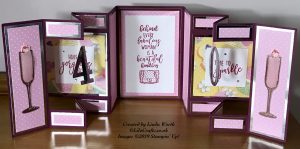
Front of card when opened
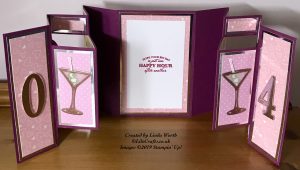
Reverse of card when opened
For this card you will need to make an envelope to fit.
- 2 pieces of coloured cardstock – 12 x 6 inches (card base), score on long side at 2, 4, 8 and 10 inches on both pieces, make a mark at 6 inches top and bottom; 2 pieces 4 x 6 inches (for centre and back panels); 1 piece 12 x 1-1/2 inches (bellyband); piece for hanging numbers; piece for large oval to join bellyband
- Silver Foil layer – 6 pieces 1-3/4 x 5-3/4 inches (long mats); 2 pieces 3-3/4 x 3-3/4 inches (square layers); 2 pieces 3-3/4 x 5-3/4 inches (for centre and back panel); 4 pieces 1-3/4 x 3-3/4 inches (thin smaller mats); 12 pieces 1-3/4 x 3/4 inches (smallest mats); piece for numbers (hanging and front of card); layer for oval
- DSP layer – 6 pieces 1-1/2 x 5-1/2 inches (long layers); 2 pieces 3-1/2 x 3-1/2 inches (square layers); 1 piece 3-1/2 x 5-1/2 inches (centre layer); 4 pieces 1-1/2 x 3-1/2 inches (thin smaller layer); 12 pieces 1-1/2 x 1/2 inches (smallest layers)
- Whisper White cardstock – 2 pieces 3 x 5 inches (centre and back panel); 2 piece 3 x 3 inches (square layer); layer for oval
- Vellum pieces for glasses
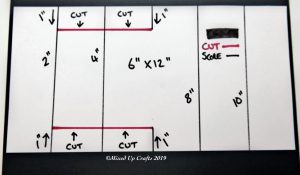
To join the two pieces, use the 2 pieces of centre and back panels cardstock, add liquid glue from the last score line to the edge (i.e. from 10 inch score line to edge) adhere one of the pieces to one piece of the card base ensuring the edges line up, then repeat this to the other piece of card base; then adhere the other centre/back panel piece to the reverse covering the join of the two card base pieces. The card is now ready to decorate, if you want the hanging numbers add these before adding the small layers as the thread is secured under the layers, numbers were created using the retired large numbers in foil and backed by matching coloured cardstock. The centre and back panels do not have silver foil on this version just DSP and white layer. White layers need to be stamped before adhering. The glasses were heat embossed in copper onto vellum, strawberries and olives are stamped onto white cardstock and coloured, these are adhered onto or behind the glasses. Glasses adhered to the card using glue dots. Silver foil numbers added to the front adhered using dimensionals.
For the bellyband which is optional large ovals dies used one is coloured cardstock, silver foil and white cardstock. Sentiment heat embossed in silver onto white cardstock, each oval layer adhered using liquid glue and adhered to the bellyband (note due to size of card bellyband will not meet, therefore ensure have large oval dies). Add embellishments if required onto the front ovAL.
Thank you for looking and hope you enjoy making your version.
Linda x
Product List


